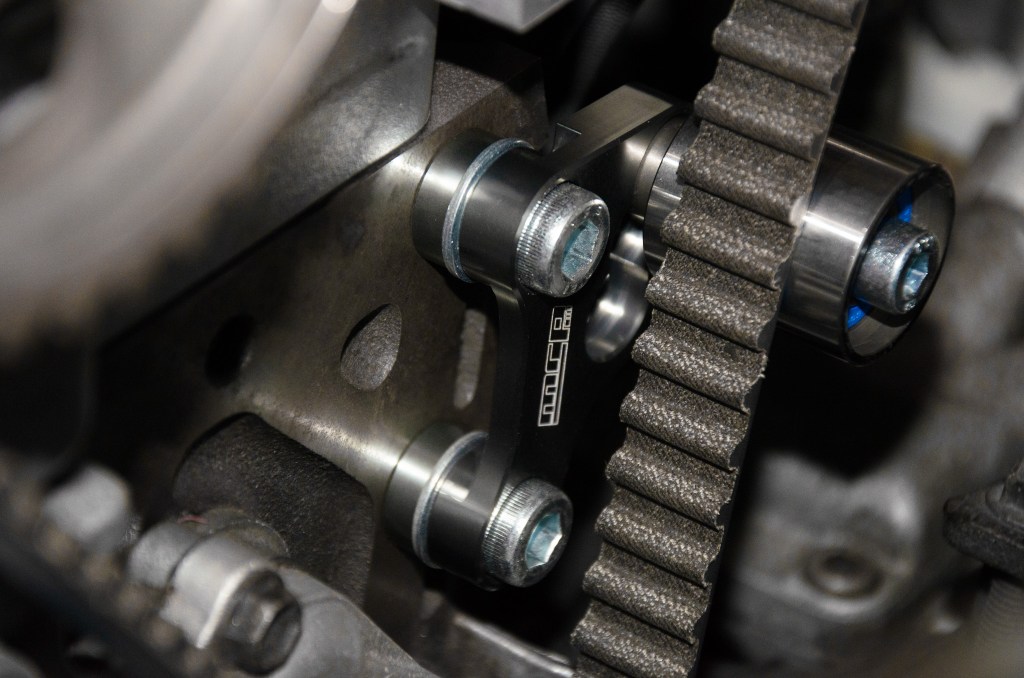
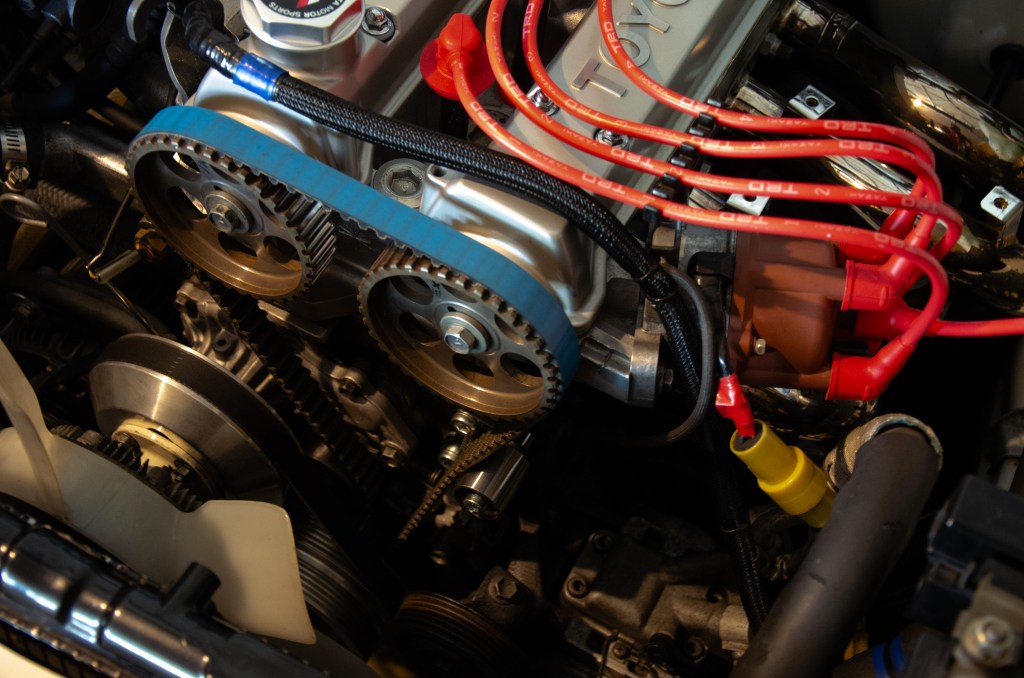
Commonly found in TRD variants of the engine, timing belt stabilisers were used to keep the long end of the belt supported, ensuring it was stable under high loads.
Though my engine is far from high performing, I recently purchased one for peace of mind. I always noticed the belt fluttering and although this is normal, we’re all aware teeth can skip when our engines decelerate from high rpms.
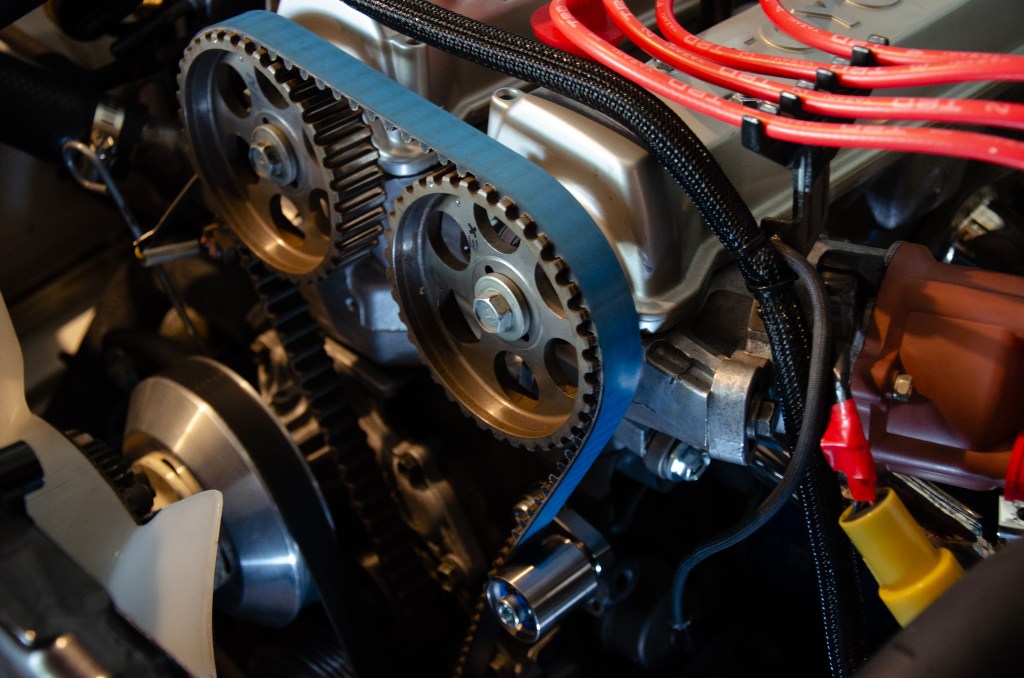
Most would compensate by tightening the belt a little over OEM spec – assurance at the cost of more engine bay noise (belt whine) and worse, a little more stress on components its wrapped around (crankshaft, camshafts, etc.) The potential long term effects aren’t worth it, the tolerances on a 4age are tight and slightest angles introduced can wear bearings down.
If your engine is always high-revving, it wouldn’t hurt having one 🙂
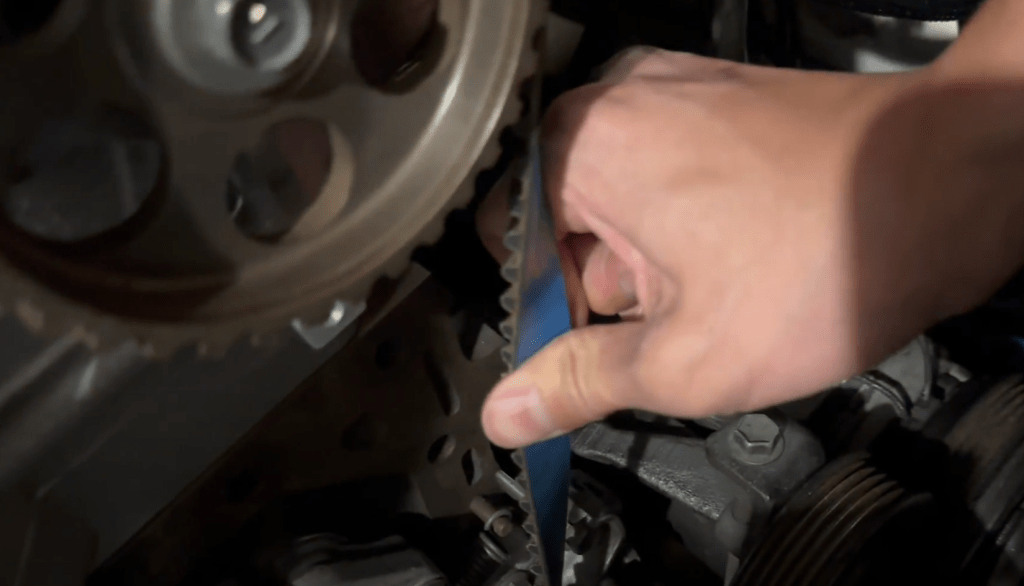
On the installation side of things, getting the belt tension right can be a bit of a nightmare without proper tools. When you realise how expensive they are, it really paints a picture on how important the job is and how long it could take without the right gear. It can still be done though, it just takes longer.
You just need to keep in mind that the tension of the belt needs to be just right and cater for two states the engine will be in: when its cold and when its hot (normal operating temperatures).
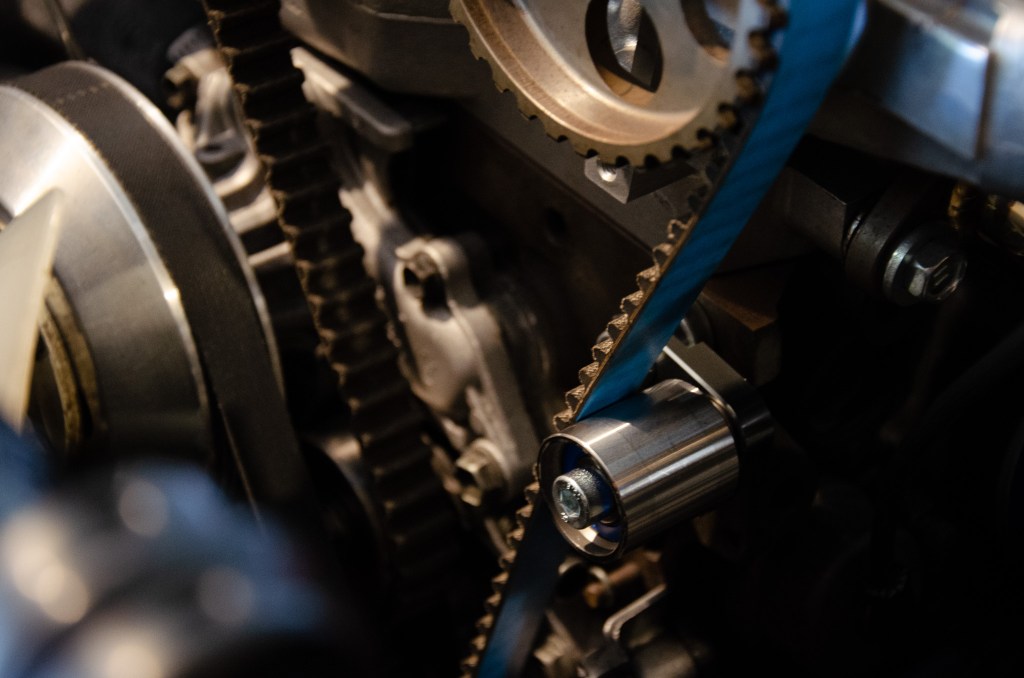
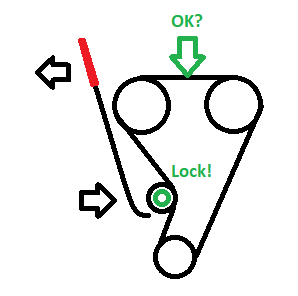
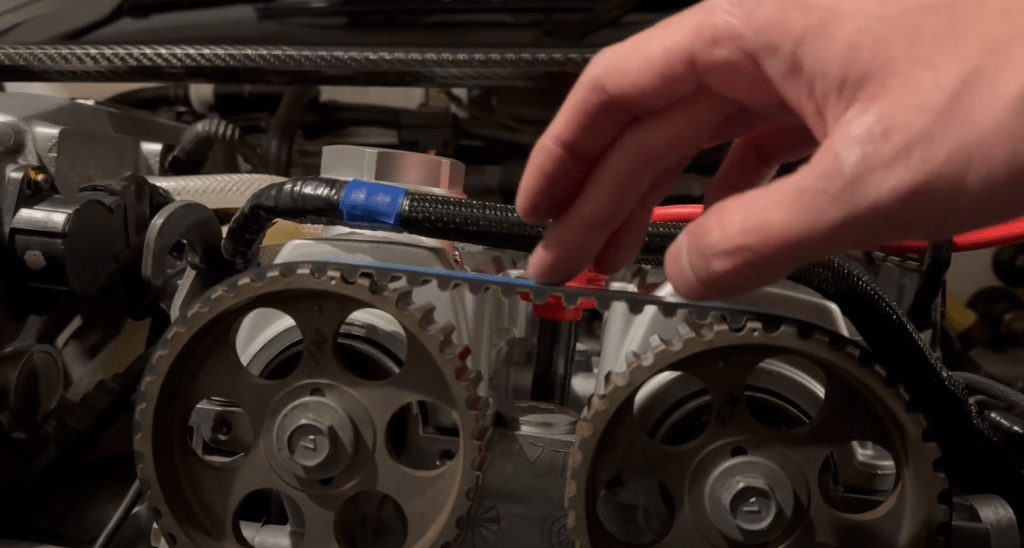
The tension is measured by force – normally applied on a designated region of the belt and usually when the engine is at TDC (top dead center). For the 4AG, the tool is normally applied where the green arrow is – and if it’s within OEM spec, you’re good to go.
Just remember though, OEM spec may not apply if the engine is modified enough (e.g. head has been resurfaced, making the assembly smaller).
If the OEM spec doesn’t apply to you, you’ll have to find the right tension for yourself.
This balancing act can be a bit of a headache…
When the engine is cold, the entire assembly contracts, making the belt looser. On top of that, if the engine head had been re-surfaced, it will be slightly smaller than OEM spec.
Also when cold, a belt on too tight will get tighter as the engine heats up. If it’s not tight enough, it may skip a tooth at start up.
When the engine heats up into operating temperature, the assembly expands and the belt gets tighter around it. If you hear a whine from the belt, then it’s too tight and you’ll have to re-adjust again.
The painful part is waiting for the engine to cool back down until it’s completely cold and start the process again, routinely checking your work in both states – which could take hours.
All that a side, once you get it right – not only will you have all the assurances outlined above, but an added bonus is that the engine becomes smoother when it revs down – as the belt won’t flutter anymore.
